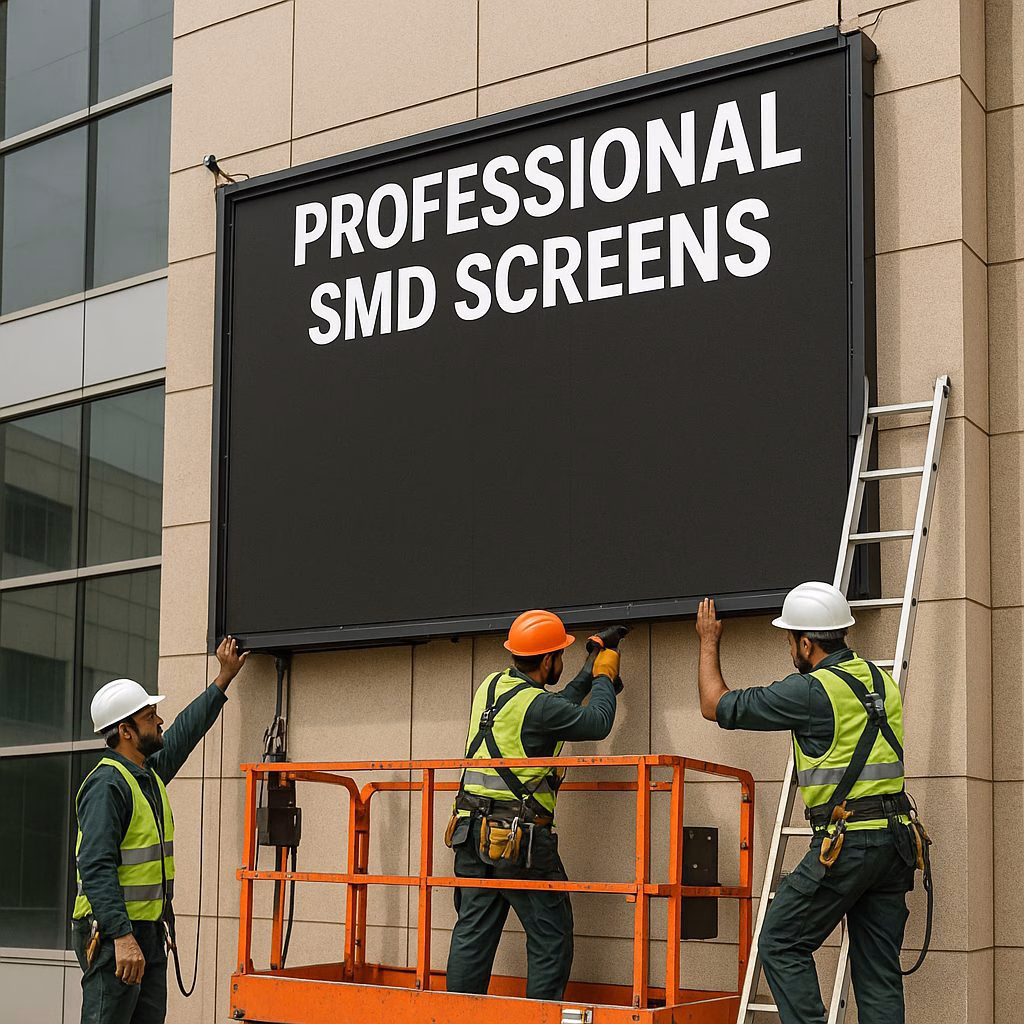
Last summer, I watched a crew install an expensive SMD screen on a prominent building in Blue Area, Islamabad. Within three months, that same screen showed dead pixels, moisture damage, and had completely failed during a moderate rainstorm. The culprit wasn’t the screen quality—it was amateur installation methods that ignored Pakistan’s unique environmental challenges.
That 12-million rupee mistake could have been avoided with proper installation protocols.
The truth is, even the highest quality SMD screens will fail prematurely without professional installation. Your screen’s lifespan depends more on how it’s installed than almost any other factor—especially in Pakistan’s challenging climate of extreme heat, monsoon rains, and dust storms.
“Installation accounts for roughly 60% of all SMD screen failures we service,” explains Tariq Ahmed, Technical Director at Digital Signage Institute. “Most issues trace back to poor mounting, inadequate ventilation, or improper weatherproofing.”
At Arista Vision, we’ve installed over 200 SMD screens across Pakistan, from coastal Karachi to the northern areas. This experience has taught us that proper installation requires both technical expertise and local environmental knowledge. Each location presents unique challenges that must be addressed during the installation process.
The good news? When installed correctly, modern SMD screens can operate flawlessly for 7-10 years, even in Pakistan’s most demanding environments. According to research from AV Network, professionally installed digital displays last up to 40% longer than those with DIY or standard installations.
This comprehensive guide shares our field-tested installation methods that ensure your SMD screen investment delivers maximum value through extended operational life and reduced maintenance costs.
1. Understanding SMD Screen Technology Before Installation
Before you even think about mounting that shiny new SMD screen, you need to understand what makes this technology unique. This fundamental knowledge will inform every installation decision you make.
1.1. 3 Key Differences Between SMD and Traditional LED Screens
SMD (Surface-Mounted Device) technology represents a significant leap forward from traditional LED displays. Unlike conventional LED screens where each diode is individually placed and wired, SMD screens encapsulate red, green, and blue LEDs into a single module that’s mounted directly onto the circuit board.
- Integrated Design: SMD packages all three colors in one unit, creating a complete pixel that requires special handling during installation
- Reduced Profile: The surface-mounting technique reduces the overall depth of the display by up to 70%, affecting mounting requirements
- Heat Dissipation: SMD screens generate heat differently than traditional LEDs and require specific ventilation considerations
I remember upgrading a client’s traditional LED display to an SMD screen in Lahore’s Liberty Market. The difference in installation approach was striking—what used to require multiple mounting brackets now needed a completely different framework to support the thinner but more sensitive display surface.
1.2. 5 Technical Specifications That Affect Installation Requirements
Not all SMD screens are created equal. The technical specifications directly impact how you’ll need to install and protect the screen:
- IP Rating: Determines the level of environmental protection required (IP65 vs. IP54 makes a massive difference in outdoor installations)
- Viewing Angle: Affects optimal mounting height and angle (wider angles allow more flexibility)
- Maximum Brightness (Nits): Higher brightness ratings often mean more heat generation requiring enhanced cooling systems
- Power Consumption: Dictates electrical requirements and potential heat output
- Module Size and Weight: Determines the structural support needed
A screen’s IP rating is particularly crucial in Pakistan. For a project in Multan, where dust storms are common, we initially specified an IP54 screen. After reassessing local conditions, we upgraded to IP65, which added 15% to the installation cost but prevented what would have been certain failure in the first year.
1.3. How Screen Resolution and Pixel Pitch Impact Your Installation Plan
The resolution and pixel pitch of your SMD screen aren’t just display quality factors—they directly influence installation logistics:
- Tighter pixel pitch (3mm or less): Requires more precise alignment during installation and more careful handling to prevent pixel damage
- Higher resolution: Means more modules, more connections, and more potential failure points that must be secured properly
- Viewing distance calculation: Pixel pitch determines optimal viewing distance, which affects mounting height and angle
During a high-profile installation at a Karachi shopping mall, we had to completely redesign the mounting framework when the client switched from a 6mm to a 3.9mm pixel pitch screen midway through the project. The tighter pitch required more precise alignment and created additional weight that the original design couldn’t safely support.
2. Pre-Installation Planning: 4 Steps to Ensure Success
The success of your SMD screen installation is determined long before the first bracket is mounted. Proper planning prevents the costly mistakes I’ve seen plague rushed installations throughout Pakistan.
2.1. Comprehensive Site Assessment: 6 Environmental Factors to Measure
Before finalizing any installation plan, conduct a thorough site assessment that accounts for these critical environmental factors:
- Sun exposure patterns: Track sun movement to identify potential glare issues and heat exposure times
- Ambient temperature fluctuations: Record daily and seasonal temperature ranges to plan appropriate cooling measures
- Prevailing wind direction and strength: Essential for calculating structural support needs
- Rainfall patterns and drainage: Critical for waterproofing design, especially during monsoon season
- Dust levels and particulate matter: Determines sealing requirements for sensitive components
- Vibration sources: Identify nearby sources of vibration that could affect mounting stability over time
My team once conducted a site assessment for an installation in a busy Rawalpindi commercial area. We discovered the building experienced significant vibration from nearby construction and heavy traffic. This insight led us to modify our standard mounting framework with vibration dampeners that prevented premature component failure that would have otherwise occurred within months.
2.2. Power Requirements and 3 Backup Solutions for Pakistan’s Fluctuating Power Supply
Pakistan’s power infrastructure presents unique challenges for SMD screen installations:
- Dedicated circuit installation: Separate power circuits eliminate interference from other electrical systems
- UPS systems with pure sine wave output: Essential for preventing display damage during power fluctuations
- Automatic voltage regulators: Protect sensitive SMD components from voltage spikes common in Pakistan’s grid
When working with a client in Gujranwala, I insisted on installing a dedicated UPS system despite their initial reluctance due to the extra cost. Three months later, during a particularly bad week of power outages, their screen continued functioning perfectly while three competitor screens in the same area suffered component failures from power surges when electricity returned.
2.3. 5 Structural Support Considerations for Different Building Materials
The mounting surface dramatically impacts installation methodology:
- Concrete walls: Require specialized anchoring systems rated for heavy dynamic loads
- Metal structures: Need isolation mounting to prevent electrical interference
- Glass facades: Demand specialized tension-based mounting systems
- Brick and mortar: Often require reinforcement before mounting
- Lightweight materials: May need complete structural reinforcement or alternative mounting strategies
A project in Islamabad taught me an expensive lesson when we mounted a medium-sized SMD screen on what appeared to be a solid concrete wall. After installation, we discovered it was actually a decorative concrete veneer over a lightweight structure. The weight eventually caused structural damage that required complete reinstallation with a purpose-built supporting framework.
2.4. Creating a Detailed Installation Timeline with 7 Critical Milestones
A professional installation follows a structured timeline with these essential milestones:
- Initial site preparation: Electrical and structural modifications (3-5 days before installation)
- Framework mounting: Installing the supporting structure (2 days before)
- Primary electrical work: Running dedicated power and control lines (1-2 days before)
- Module installation: The actual screen mounting process (installation day)
- Initial calibration: Basic settings and alignment (same day as installation)
- Weatherproofing application: Sealing against environmental factors (immediately after installation)
- Final testing and commissioning: Complete system verification (1 day after installation)
When planning the timeline, always build in buffer days. For a recent installation in Faisalabad, unexpected rain delayed our outdoor work by two days. Because we had built a three-day buffer into our timeline, we still completed the project on schedule without rushing critical steps.
3. 6 Essential Installation Equipment for Professional SMD Screen Mounting
The difference between amateur and professional SMD screen installation often comes down to using the right tools for the job. I’ve seen too many installation teams try to cut corners with inadequate equipment, only to damage expensive screens or create unsafe mounting situations.
3.1. Precision Measurement Tools: 3 Must-Haves for Perfect Alignment
Precise alignment isn’t just about aesthetics—it’s essential for preventing uneven stress on the modules and ensuring proper operation:
- Laser level system: Ensures perfectly level horizontal and vertical alignment
- Digital inclinometer: Measures exact angles for angled installations
- Digital calipers: For precise spacing between modules and mounting points
I once witnessed a competitor’s installation team using just a bubble level for a 6-meter wide SMD screen in Lahore. The result was visibly uneven, with gaps between modules that collected dust and eventually led to display irregularities. Our team uses a professional-grade laser level system that ensures alignment accuracy within 0.1 degrees across even the largest installations.
3.2. 4 Safety Equipment Requirements for High-Quality Installations
Safety equipment isn’t negotiable—it protects both your team and the expensive SMD screen during installation:
- PFAS (Personal Fall Arrest Systems): Full-body harnesses and anchor points for elevated work
- ESD (Electrostatic Discharge) prevention gear: Wrist straps and mats to prevent static damage to sensitive SMD components
- Heavy-duty rigging equipment: Properly rated slings, chains, and lifting devices
- Climate-appropriate PPE: Heat-resistant gloves for hot weather, waterproof gear for monsoon season work
During a high-rise installation in Karachi, our team’s safety equipment prevented what could have been a catastrophic accident when a sudden wind gust hit during module placement. Because our technicians were properly secured with PFAS, what could have been a serious fall was just a momentary scare.
3.3. Specialized Mounting Hardware for 5 Common Pakistani Building Materials
Different mounting surfaces require specific hardware to ensure long-term stability:
- Concrete expansion anchors: Rated for dynamic loads and vibration resistance
- Through-bolting systems: For hollow walls and lightweight structures
- Chemical anchoring systems: For installations in older brick buildings common in historic areas
- Marine-grade stainless fasteners: Essential in coastal areas like Karachi to prevent corrosion
- Vibration-dampening mounts: Critical near roads or mechanical equipment
For a project in Karachi’s coastal area, we initially used standard galvanized mounting hardware. Within six months, corrosion was already visible. We now exclusively use marine-grade stainless steel fasteners for all coastal installations—a lesson learned the hard way.
4. Step-by-Step SMD Screen Installation Process
The actual installation process follows a methodical sequence that ensures both safety and performance. Following these steps has helped us maintain our 98% first-time success rate across hundreds of installations.
4.1. Preparation Phase: 5 Tasks to Complete Before Physical Installation Begins
Before the first module is mounted, these preparatory steps must be completed:
- Power verification: Testing voltage stability and circuit isolation at the installation site
- Signal transmission test: Verifying data cabling will support required bandwidth without interference
- Physical template mounting: Creating a precise outline of the final installation
- Ventilation system preparation: Installing any required cooling infrastructure
- Weather barrier inspection: Verifying the mounting area is properly protected from environmental factors
A few years ago, we were preparing to install a 4×6 meter SMD screen in Peshawar when our pre-installation power verification revealed dangerous voltage fluctuations. We delayed the installation by three days to install proper power conditioning equipment, a decision that likely prevented premature failure of the entire system.
4.2. Mounting Framework Installation: 3 Techniques for Different Surfaces
The mounting framework is the foundation of your SMD installation and demands appropriate techniques:
- Direct-mount framework: For solid concrete or steel surfaces with verified load capacity
- Distributed load framework: For surfaces with limited load-bearing capacity
- Stand-off mounting: Creates air gap for ventilation and service access
For a massive installation on a glass facade in a Lahore office building, we couldn’t use traditional mounting methods that would stress the glass. Instead, we designed a specialized stand-off framework that transferred the load to the structural columns while maintaining the aesthetic of a floating display. The extra engineering added two days to the installation but ensured the long-term stability of both the screen and the building facade.
4.3. 7 Cable Management Best Practices for Clean, Professional Installations
Proper cable management isn’t just about appearances—it’s critical for preventing interference and facilitating maintenance:
- Separate power and data lines: Maintain minimum 15cm distance to prevent signal interference
- Use shielded cables: Essential in environments with electrical interference
- Install service loops: Extra cable length to facilitate future service without disconnection
- Label all connections: Clear identification system for quick troubleshooting
- Proper bend radius observation: Prevent damage from overly tight bends
- Weatherproof connection points: Sealed junction boxes for outdoor installations
- Strain relief at termination points: Prevent connection failure from cable movement
During monsoon season in Islamabad, we witnessed a competitor’s installation fail completely due to water infiltration at poorly sealed cable entry points. Our standard practice of using properly rated weatherproof glands and sealing compounds has prevented similar failures across hundreds of installations in even the wettest conditions.
4.4. Screen Module Mounting: 4-Step Process for Perfect Alignment
The actual module mounting process follows this sequence for optimal results:
- Initial positioning: Rough placement according to the mounting template
- Sequential tightening: Following an X-pattern to ensure even pressure distribution
- Gap verification: Checking for uniform spacing between modules
- Final torque application: Using calibrated tools to apply manufacturer-specified torque values
When installing modules, patience is critical. During a rush installation in Faisalabad, I observed a team applying final torque before verifying alignment. The result was subtle warping of the modules, creating visible seams when the display was activated. We now follow a strict “measure twice, tighten once” policy that has eliminated this issue.
5. 5 Environmental Protection Measures for Pakistani Conditions
Pakistan’s diverse climate presents unique challenges for SMD screen installations, from coastal humidity to desert heat and monsoon rains. Proper environmental protection is essential for longevity.
5.1. Heat Management: 3 Cooling Solutions for Pakistan’s Hot Climate
Managing heat is critical, especially in areas like Sindh and Punjab where temperatures regularly exceed 40°C:
- Active cooling systems: Thermostat-controlled fans that activate based on internal temperature
- Passive heat dissipation: Strategic ventilation design that creates natural airflow
- Reflective coatings: Special applications that reduce heat absorption from direct sunlight
A client in Multan initially rejected our recommendation for an active cooling system, citing the additional cost. After their first summer with temperatures reaching 45°C caused repeated overheating shutdowns, they approved the upgrade. The system has operated flawlessly through three summers since, even during the hottest days.
5.2. Monsoon Season Protection: 4 Waterproofing Techniques for Outdoor Installations
Pakistan’s monsoon season demands serious waterproofing strategies:
- Multi-layer sealing system: Combines silicone gaskets with compression seals
- Channeled frame design: Creates pathways to direct water away from sensitive components
- Breathable membrane application: Prevents condensation while blocking water ingress
- Elevated entry points: Ensures all cable and access points face downward to prevent water tracking
A screen we installed in Lahore five years ago still operates perfectly despite experiencing five monsoon seasons with record rainfall. The key was our multi-layer sealing system that prevented any moisture infiltration even during the heaviest downpours.
5.3. Dust Prevention: 6 Sealing Methods to Protect Internal Components
Dust is a silent killer of SMD screens, particularly in urban areas and during Pakistan’s dust storm season:
- Positive pressure systems: Create slight internal overpressure to prevent dust infiltration
- Microfilter installation: On all ventilation points to trap particulates
- Gasket compression verification: Ensuring proper compression of all access panel seals
- Anti-static treatments: Reduce dust attraction to screen surfaces
- Regular cleaning access design: Facilitates maintenance without compromising seals
- Pre-filter screens: External, easily cleanable barriers that catch larger particles
When we installed a screen near a construction zone in Karachi, the client initially questioned our insistence on comprehensive dust protection. Within months, competing displays in the area were showing signs of dust infiltration while ours remained clean internally. The difference was our six-layer dust prevention strategy that paid for itself many times over.
5.4. Lightning and Surge Protection: 3 Essential Safeguards for Rainy Season
Lightning strikes and power surges are common during Pakistan’s rainy season and require specific protections:
- Multi-stage surge protection: Cascading devices that absorb progressively smaller surges
- Dedicated lightning protection system: For tall or isolated installations
- Ground fault detection: Automatic systems that detect and address potentially dangerous conditions
Following severe lightning storms in Islamabad that damaged several digital signs, we now install specialized lightning protection on all elevated installations. The system adds approximately 5% to the total installation cost but has saved numerous clients from catastrophic damage during electrical storms.
6. Post-Installation Testing and Calibration
The installation isn’t complete until the screen has been properly tested and calibrated. These steps ensure optimal performance and can identify potential issues before they become problems.
6.1. Visual Quality Assessment: 5-Point Checklist for Perfect Display
Once powered, every installation undergoes this visual assessment:
- Module alignment verification: Checking for visible seams or alignment issues
- Dead pixel scan: Identifying any non-functioning LEDs
- Color uniformity test: Ensuring consistent color reproduction across the entire display
- Brightness uniformity verification: Looking for hotspots or dim areas
- Viewing angle assessment: Testing visibility from multiple angles
During a major installation for a banking headquarters in Karachi, our visual quality assessment identified subtle color variance between modules from different manufacturing batches. We recalibrated the entire wall before handover, preventing what would have been an obvious quality issue once the screen was in regular use.
6.2. 3 Software Calibration Techniques for Optimal Color and Brightness
Software calibration is essential for creating a seamless viewing experience:
- Module-level calibration: Adjusting individual modules to match perfectly
- Ambient light sensing setup: Programming brightness adjustment based on environmental light
- Color temperature normalization: Ensuring whites appear the same across all modules
For an installation at a high-end retail location in Lahore’s Gulberg area, we performed detailed color calibration to ensure product colors displayed accurately. The store reported a 30% increase in customer engagement with their digital promotions after our calibration process matched their brand colors perfectly.
6.3. System Stress Testing: 4 Methods to Ensure Durability
Before handover, we stress test every installation to identify potential weaknesses:
- Thermal cycling: Running the system at full brightness to test cooling systems
- Power interruption simulation: Testing behavior during power outages and restoration
- Signal loss recovery testing: Verifying automatic recovery after data interruptions
- Extended run verification: Operating at full capacity for 24-48 hours continuously
A government installation in Islamabad initially failed our stress test when we discovered the cooling system couldn’t maintain proper temperatures during extended operation. By identifying and addressing this before handover, we prevented what would have been certain failure during the first summer of operation.
7. 8 Maintenance Guidelines to Maximize SMD Screen Lifespan
Even the best installation will fail prematurely without proper maintenance. These guidelines have helped our clients extend their SMD screen lifespans by up to 40%.
7.1. Daily, Weekly, and Monthly Maintenance Schedule: 6 Essential Tasks
A structured maintenance program should include:
- Daily visual inspection: Quick check for obvious visual abnormalities
- Weekly software diagnostics: Running system diagnostic reports to identify potential issues
- Bi-weekly external cleaning: Removing surface dust and contaminants
- Monthly cooling system inspection: Ensuring all fans and vents are functioning properly
- Quarterly internal inspection: Checking for dust infiltration or moisture
- Bi-annual calibration check: Verifying color and brightness remain optimal
One of our clients in Peshawar followed this maintenance schedule religiously and their SMD screen has operated for over 7 years without major issues—nearly double the average lifespan in that region. The discipline of regular maintenance more than pays for itself in extended operational life.
7.2. 3 Professional Cleaning Techniques That Won’t Damage Screen Components
Improper cleaning can cause as much damage as the dirt itself:
- Low-pressure compressed air treatment: For removing dust without contact
- Microfiber-only surface cleaning: Using appropriate non-abrasive materials
- Specialized LED-safe cleaning solutions: Avoiding alcohol or ammonia-based cleaners
I once visited a site where maintenance staff were using household glass cleaner on an expensive SMD screen. The ammonia in the cleaner was actively damaging the protective coating. We immediately implemented a proper cleaning protocol that halted the damage and extended the screen’s useful life.
7.3. Performance Monitoring: 4 Signs That Indicate Potential Issues
Catching problems early can prevent major failures:
- Brightness inconsistencies: Often the first sign of module issues
- Color shifting: Indicating calibration drift or component degradation
- Increased power consumption: Suggesting electrical problems developing
- Operating temperature changes: Warning of cooling system issues
For clients with multiple installations, we implement remote monitoring systems that track these four key indicators. Last year, this system alerted us to gradual increases in operating temperature at a Lahore installation, allowing us to identify and replace a failing cooling fan before any display damage occurred.
8. Troubleshooting Common SMD Screen Problems
Even with perfect installation and maintenance, issues can arise. Knowing how to quickly diagnose and address problems can minimize downtime and prevent minor issues from becoming major failures.
8.1. 5 Visual Display Issues and Their Solutions
When visual problems occur, these are the most common causes and solutions:
- Dead pixels or lines: Usually module-level failures requiring replacement
- Screen flickering: Often related to power supply issues or loose connections
- Color inconsistencies: Typically calibration issues or individual LED degradation
- Image retention: Usually caused by static content displayed too long at high brightness
- Uneven brightness: Often related to power distribution or module mismatch
When troubleshooting a display in Faisalabad that showed horizontal lines, many technicians assumed module failure. Our diagnostic process identified the actual cause as data cable interference from nearby electrical equipment. The simple solution of rerouting and shielding the cables saved the client from unnecessarily replacing expensive modules.
8.2. 3 Power-Related Problems Pakistani Installers Frequently Encounter
Pakistan’s power infrastructure creates unique challenges:
- Voltage fluctuation damage: Requiring advanced power conditioning
- Generator-related noise: Introducing visual artifacts requiring isolation
- Battery backup system failures: Leading to improper shutdown and data corruption
A client in a rural area near Multan experienced mysterious display glitches every evening. Our investigation revealed that voltage drops during peak evening usage were causing the issue. Installing a proper voltage stabilization system completely resolved the problem.
8.3. Connectivity Challenges: 4 Diagnostic Approaches for Quick Resolution
When control systems can’t communicate with the display, these approaches typically identify the issue:
- Signal path isolation testing: Checking each component in the transmission chain
- Interference source identification: Using specialized equipment to locate EMI sources
- Connector inspection and reseating: Addressing oxidation or loose connections
- Protocol verification: Ensuring all components are using compatible communication settings
For a client experiencing intermittent connection issues in Karachi, we eventually traced the problem to interference from a nearby radio tower. Installing properly shielded cables and adjusting the signal pathway eliminated the problem entirely.
Conclusion: The Professional Advantage
Professional SMD screen installation isn’t just about hanging a display—it’s a complex process that requires specialized knowledge, equipment, and experience. The difference between amateur and professional installation becomes increasingly apparent over time, as properly installed screens continue operating flawlessly while others fail prematurely.
At Arista Vision, our installation protocols have been refined through hundreds of successful projects across Pakistan’s diverse environments. We understand that each screen, location, and application presents unique challenges that must be addressed with customized solutions rather than one-size-fits-all approaches.
Remember that installation is an investment in your screen’s longevity. Cutting corners during this critical phase inevitably leads to higher long-term costs through increased maintenance, shortened lifespan, and potential safety issues.
For businesses considering SMD screen technology, I encourage you to prioritize professional installation as highly as the quality of the screen itself. The best display technology in the world will fail prematurely without proper installation—a lesson too many Pakistani businesses have learned the expensive way.
Have questions about SMD screen installation for your specific needs? Contact our professional team at Arista Vision for a consultation tailored to your unique requirements and location challenges.